
How to sew a mini bear
If you're looking for a hand sewn felt project that is adorable, easy enough for a total beginner and completely free.....you're in the right place. Read on and you will learn how to make a mini bear that you will be super proud of. This cute mini bear is a hand sewn project that is made following the free pattern from A Sewing Life. To receive a copy of the pattern
click here and subscribe and the pattern and instructions will be emailed straight to you. The digital pattern that you will receive includes more detailed instructions than this tutorial.
Choose your felt
First of all, you will need some felt. You don't need very much at all; 14 x 9 cm is plenty. If you want to add a heart and a face you will need a tiny piece of white and pink felt 2 x 2 cm each. Because this is such a quick and easy project to try hand sewing, it doesn't matter too much about what quality of felt that you use. However, if you are interested to know what kind of felt would be best, click here.
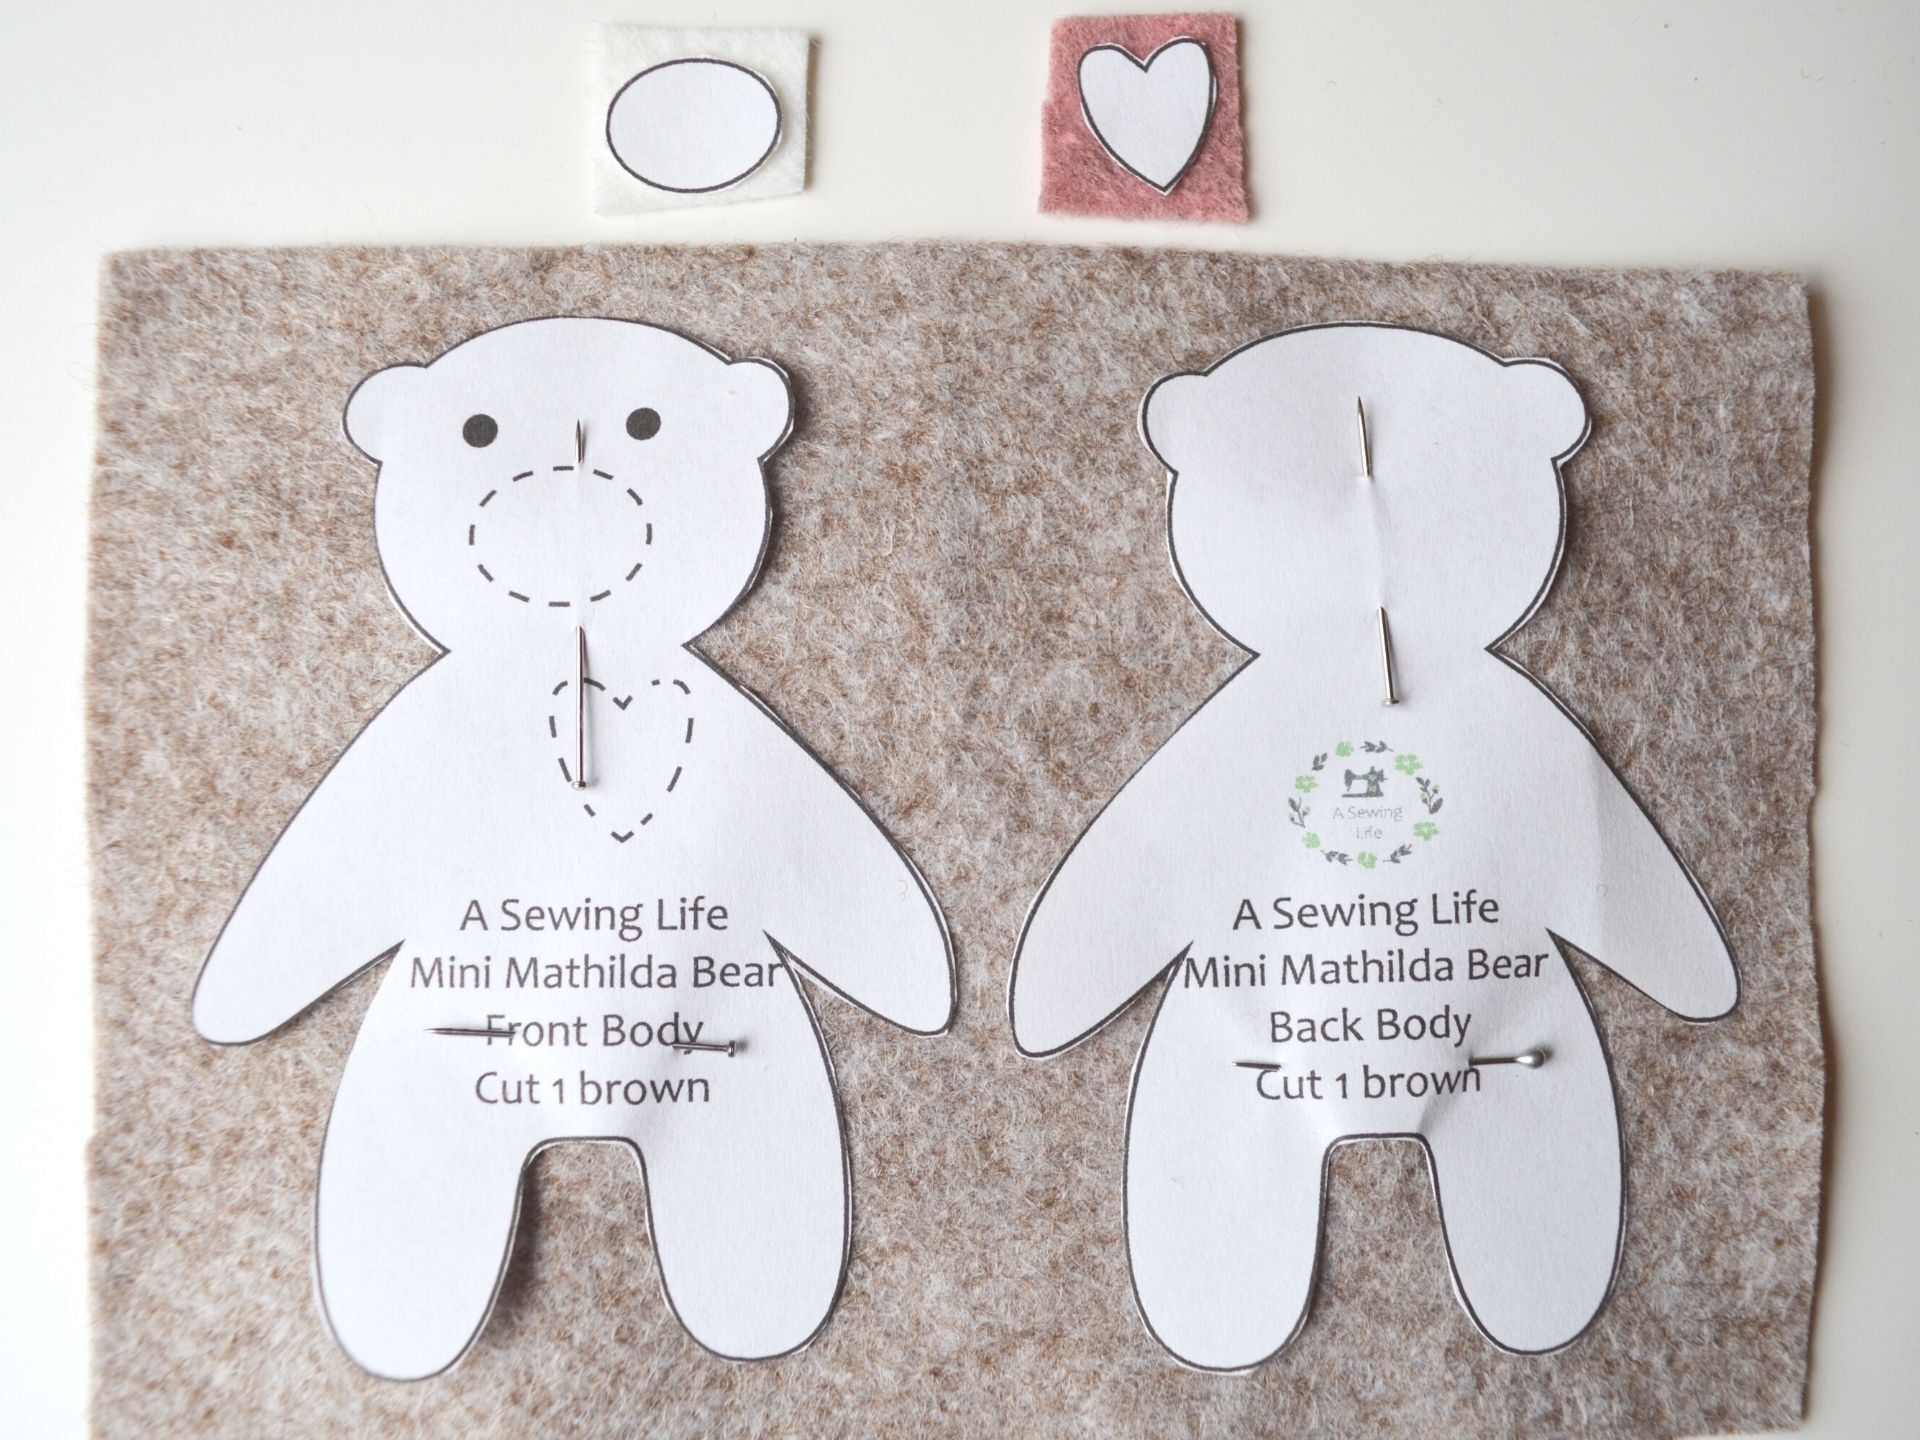
Cut out the pattern pieces.
Print off the page of the digital pattern that has the pattern pieces on. If you would like some guidance on using a digital pattern, click here. Cut the pattern pieces out of the felt.
Equipment
You can make this mini bear with the most basic of equipment. You will only need scissors, a needle and thread. If you choose to embroider the face, you will also need a length of embroidery thread. To start hand sewing, there is very little equipment needed. If you would like to read a blog post about the basic sewing equipment needed, click here.
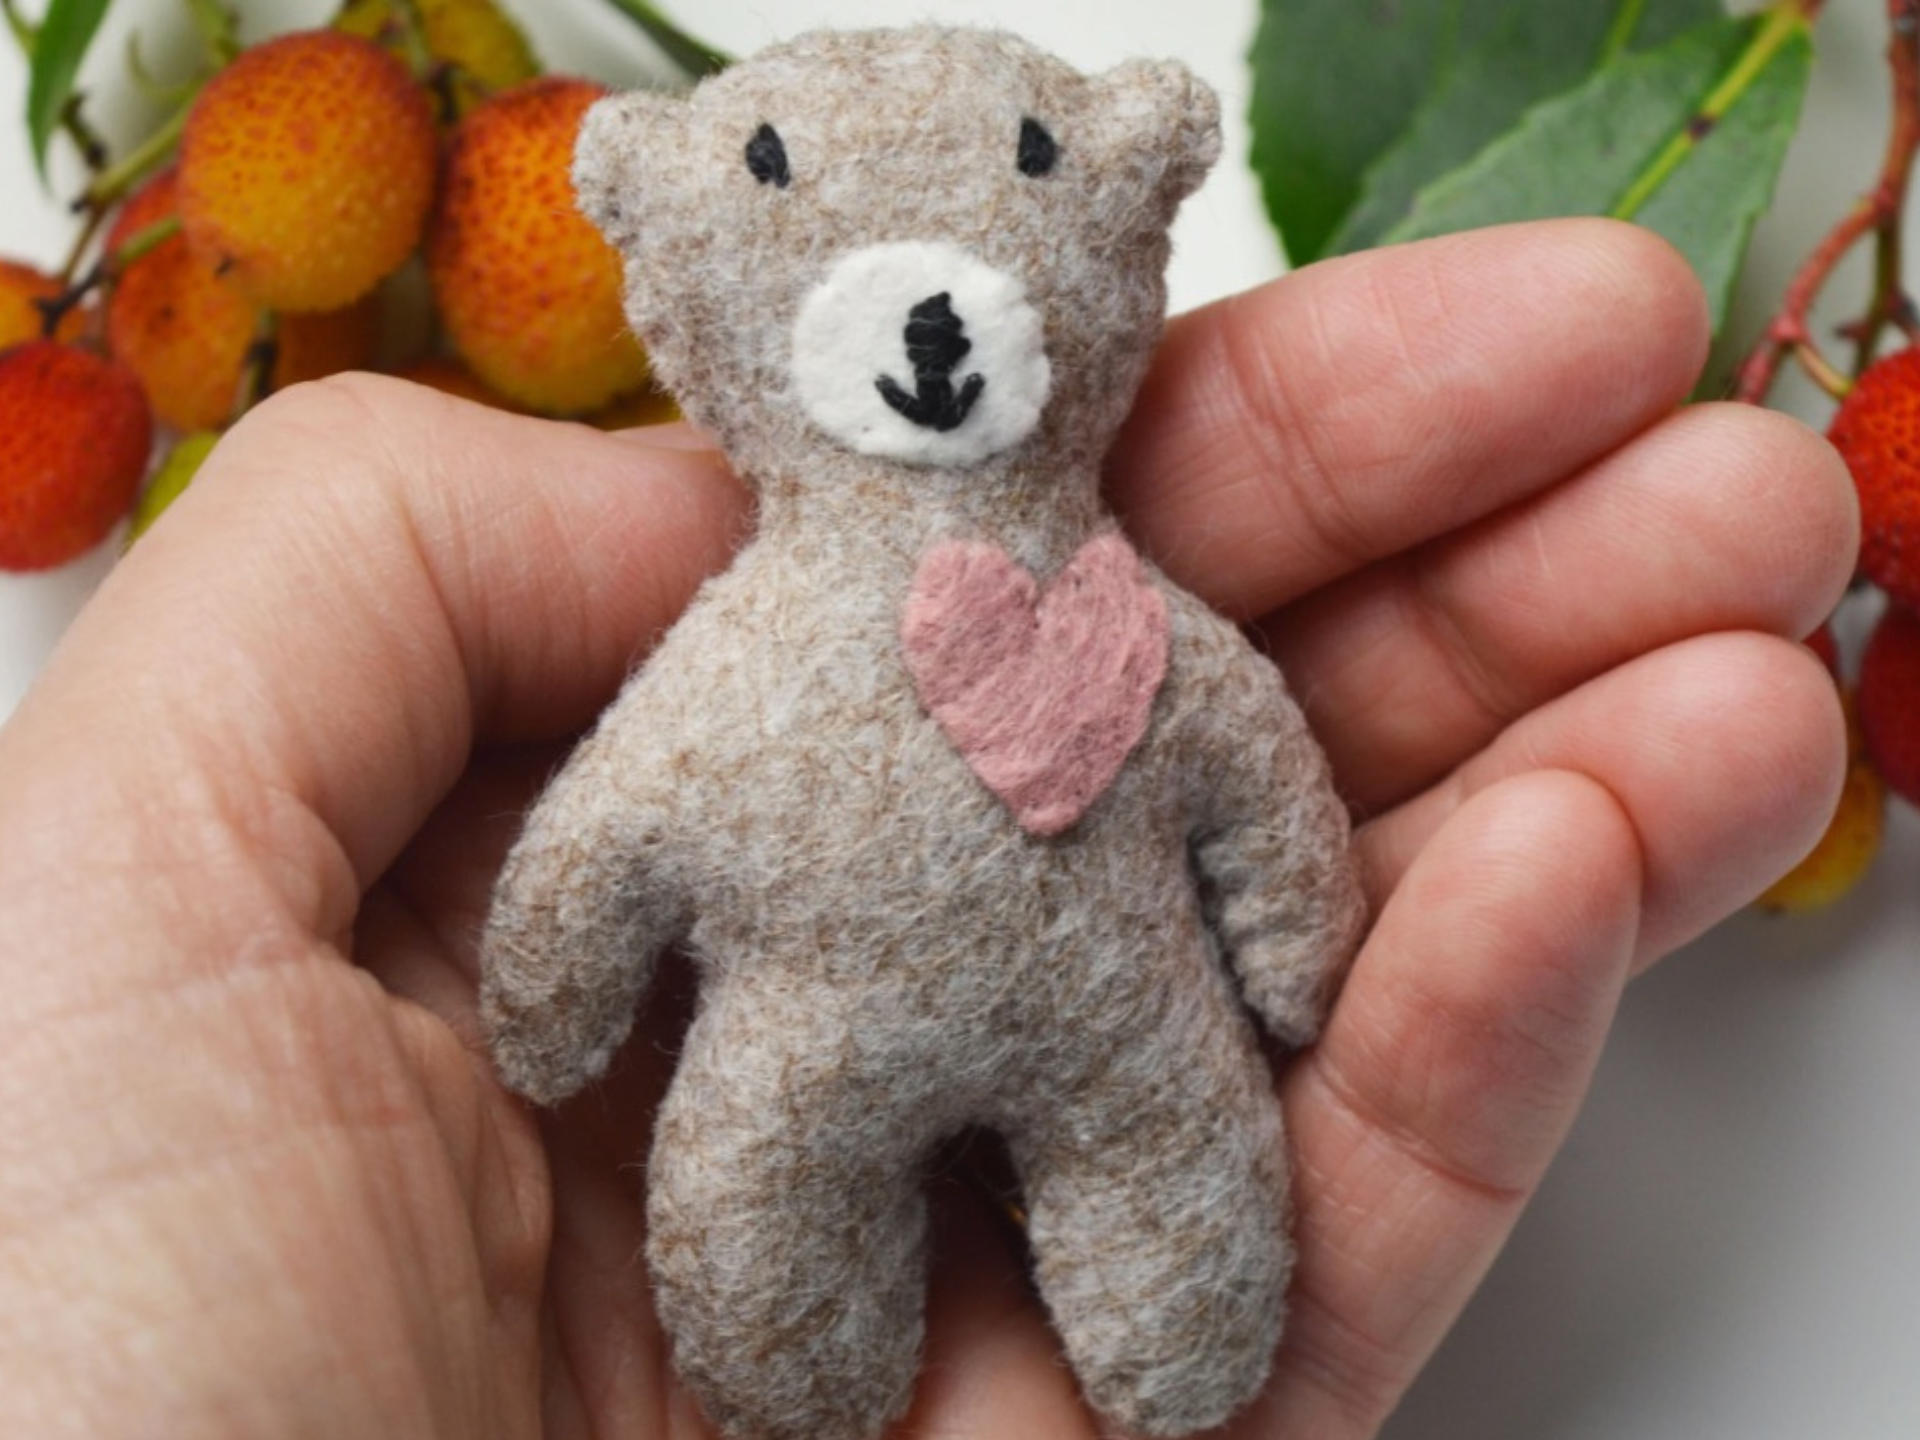
Create a Face
Before starting the body, give the bear some features on his face. You can use embroidery thread for this which is readily available in craft shops. Often, there are 6 interwoven strands on an embroidery thread. You can leave the thread as it is or make it a bit slimmer by splitting the thread so that you only have 3 threads instead of 6.
Follow the instructions on the pattern to create a nose and mouth on the white face.
Now sew some eyes on his face in the position marked on the pattern. If you prefer something much easier, you can simply draw the features rather than sewing them. There really are no hard and fast rules with sewing projects. You choose what feels right for your project.

Attach the Face
- Sew a couple of stitches to the head to secure the thread. Do it underneath where the white face will be attached.
- Use whip stitch to attach the white face to the head. The black lines show where the thread will be seen, the broken lines indicate where the stitch will be hidden behind the back of the felt.
- This shows the position of the needle for whip stitch
- When the white face is attached to the head, the stitches will barely be seen.

Add a Heart
If you would like to add a heart, use whip stitch to sew the heart to the front body piece. This is an optional extra.
Sew the body
Place the 2 body pieces on top of each other. They should be exactly the same size and shape. If they are not, slightly trim off any excess fabric to make them line up. Use whip stitch again to sew the body pieces together. When you get about 4cm away from the point where you started start adding some stuffing.
Stuff the Body
You can use any kind of stuffing. Toy stuffing or polyester stuffing are the same thing under a different name. Use a pencil to carefully push the stuffing into the arms and legs then fill the head and the body. Do not push too hard as you don't want to rip the seams. If you want to you can include some lavender inside to give it a lovely smell or even a few drops of an essential oil.

What Next?
If you have not already done so, subscribe and receive the free pattern for the mini felt bear by clicking here.