
Hand sewing stitch guide
This guide will show you how to sew some basic sewing stitches that are most commonly used in the sewing projects in A Sewing Life. It covers:
Whip stitch
Applique using whip stitch
Ladder Stitch
Blanket stitch
French knots (This is technically an embroidery stitch but it's included in here as it's used in some of the smaller projects to make eyes and is useful to learn).
Embroidery thread or sewing thread?
Either embroidery thread or sewing thread can be used for these stitches. Using sewing thread will make the stitches less visible. Embroidery thread is slioghtly thicker and the stitches will be slightly more visible. Always use embroidery thread to embroider French knots. Either embroidery thread or sewing thread can be used to ladder stitch or applique using whip stitch. These decisions can be made based on personal choice.
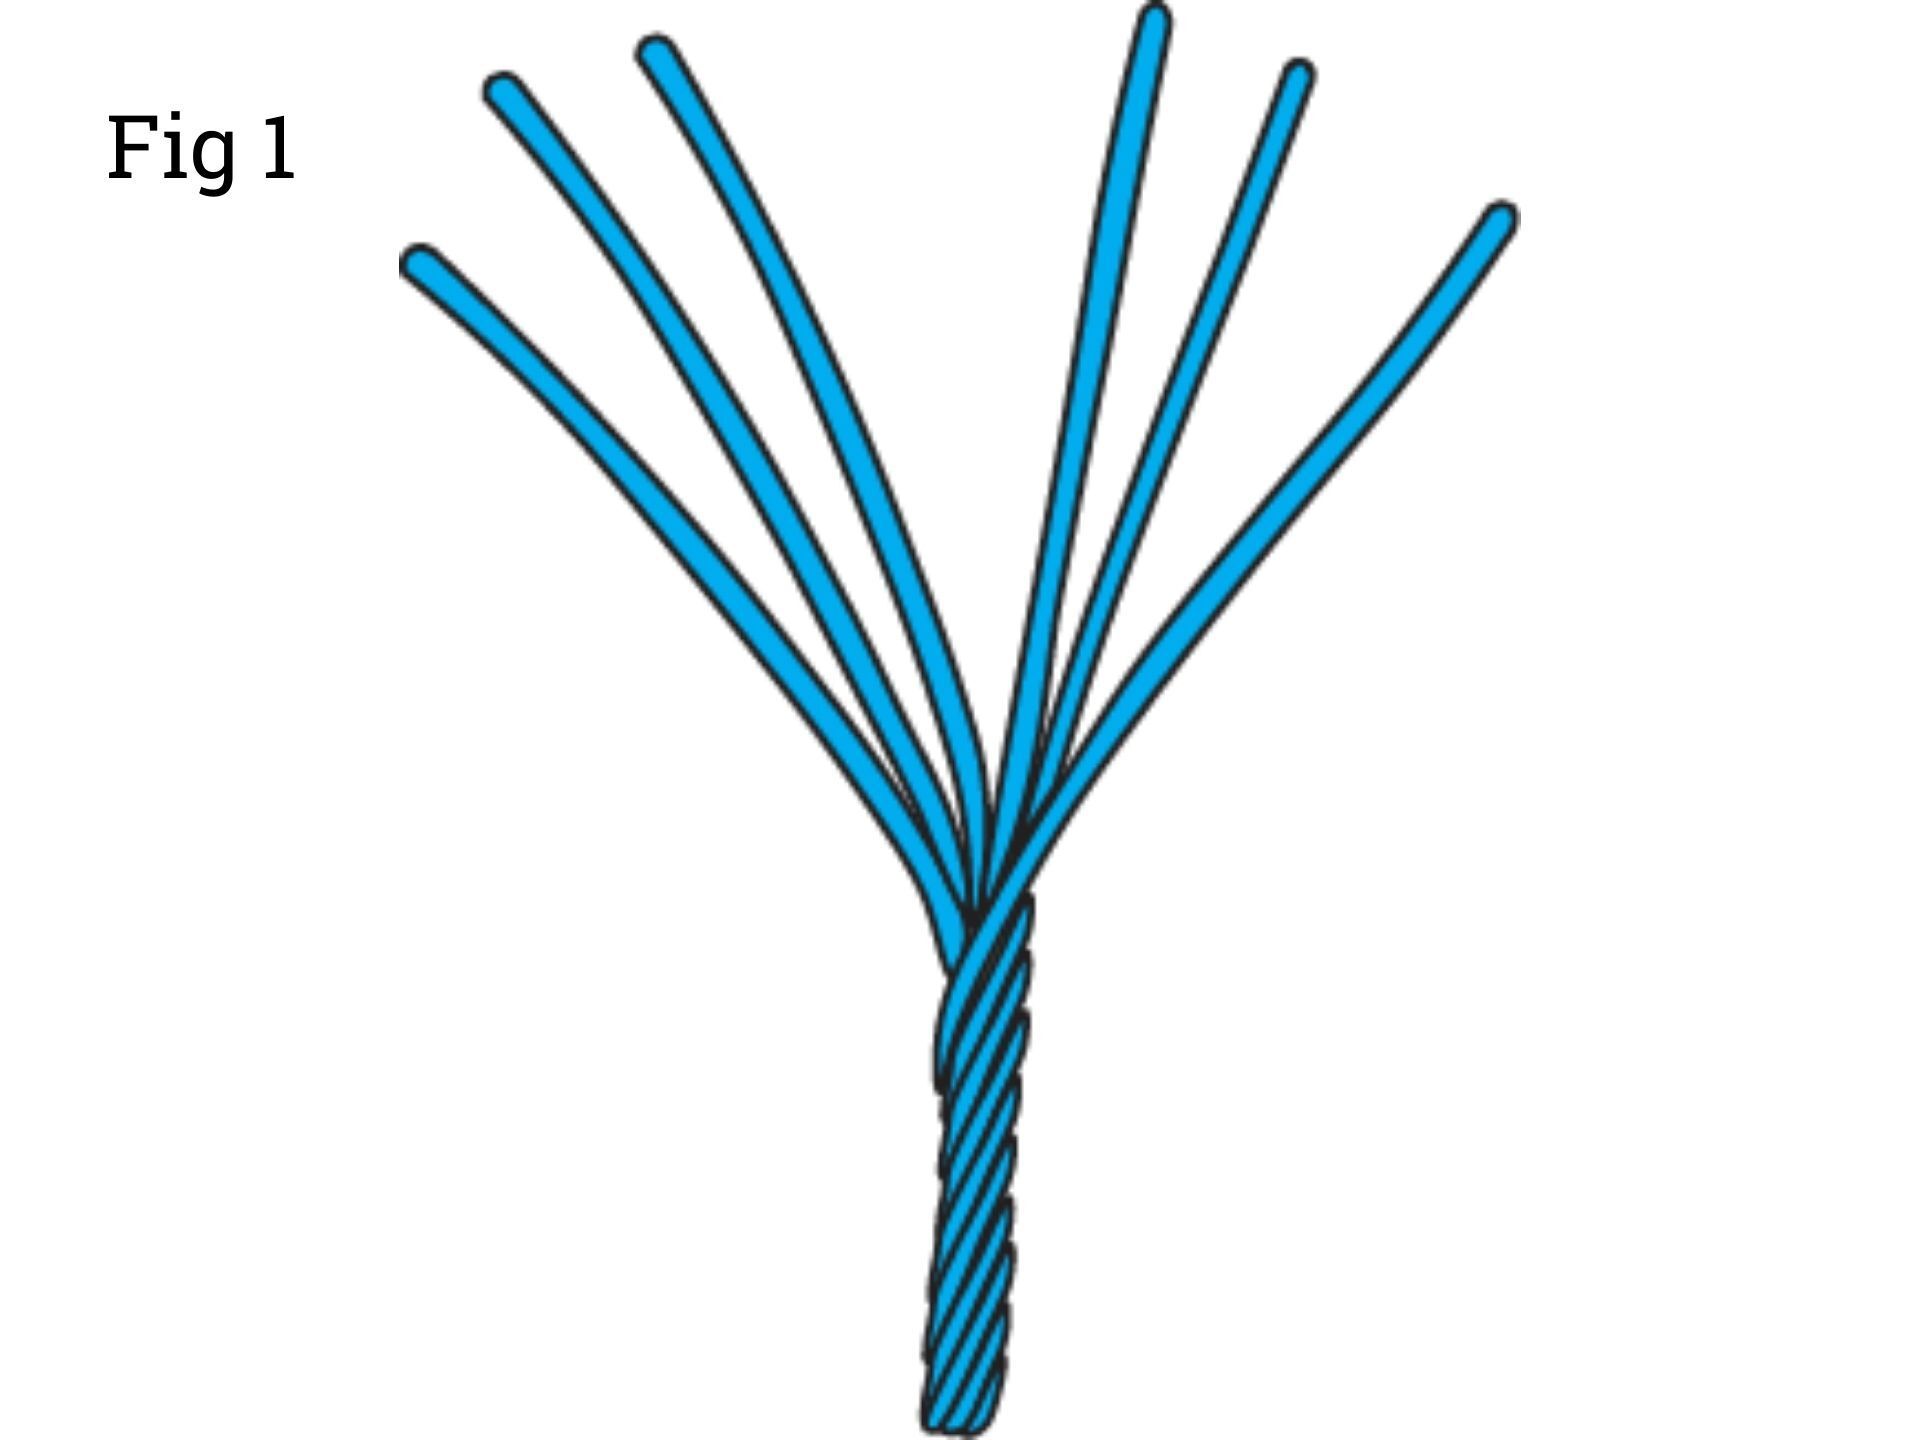
A piece of embroidery thread has 6 strands which are twisted together to form 1 piece of thread. 6 strands will be too thick to use on these projects and they should be separate into 1 or 2 strands. Cut the piece of thread to length and then separate the strands out (Fig 1).
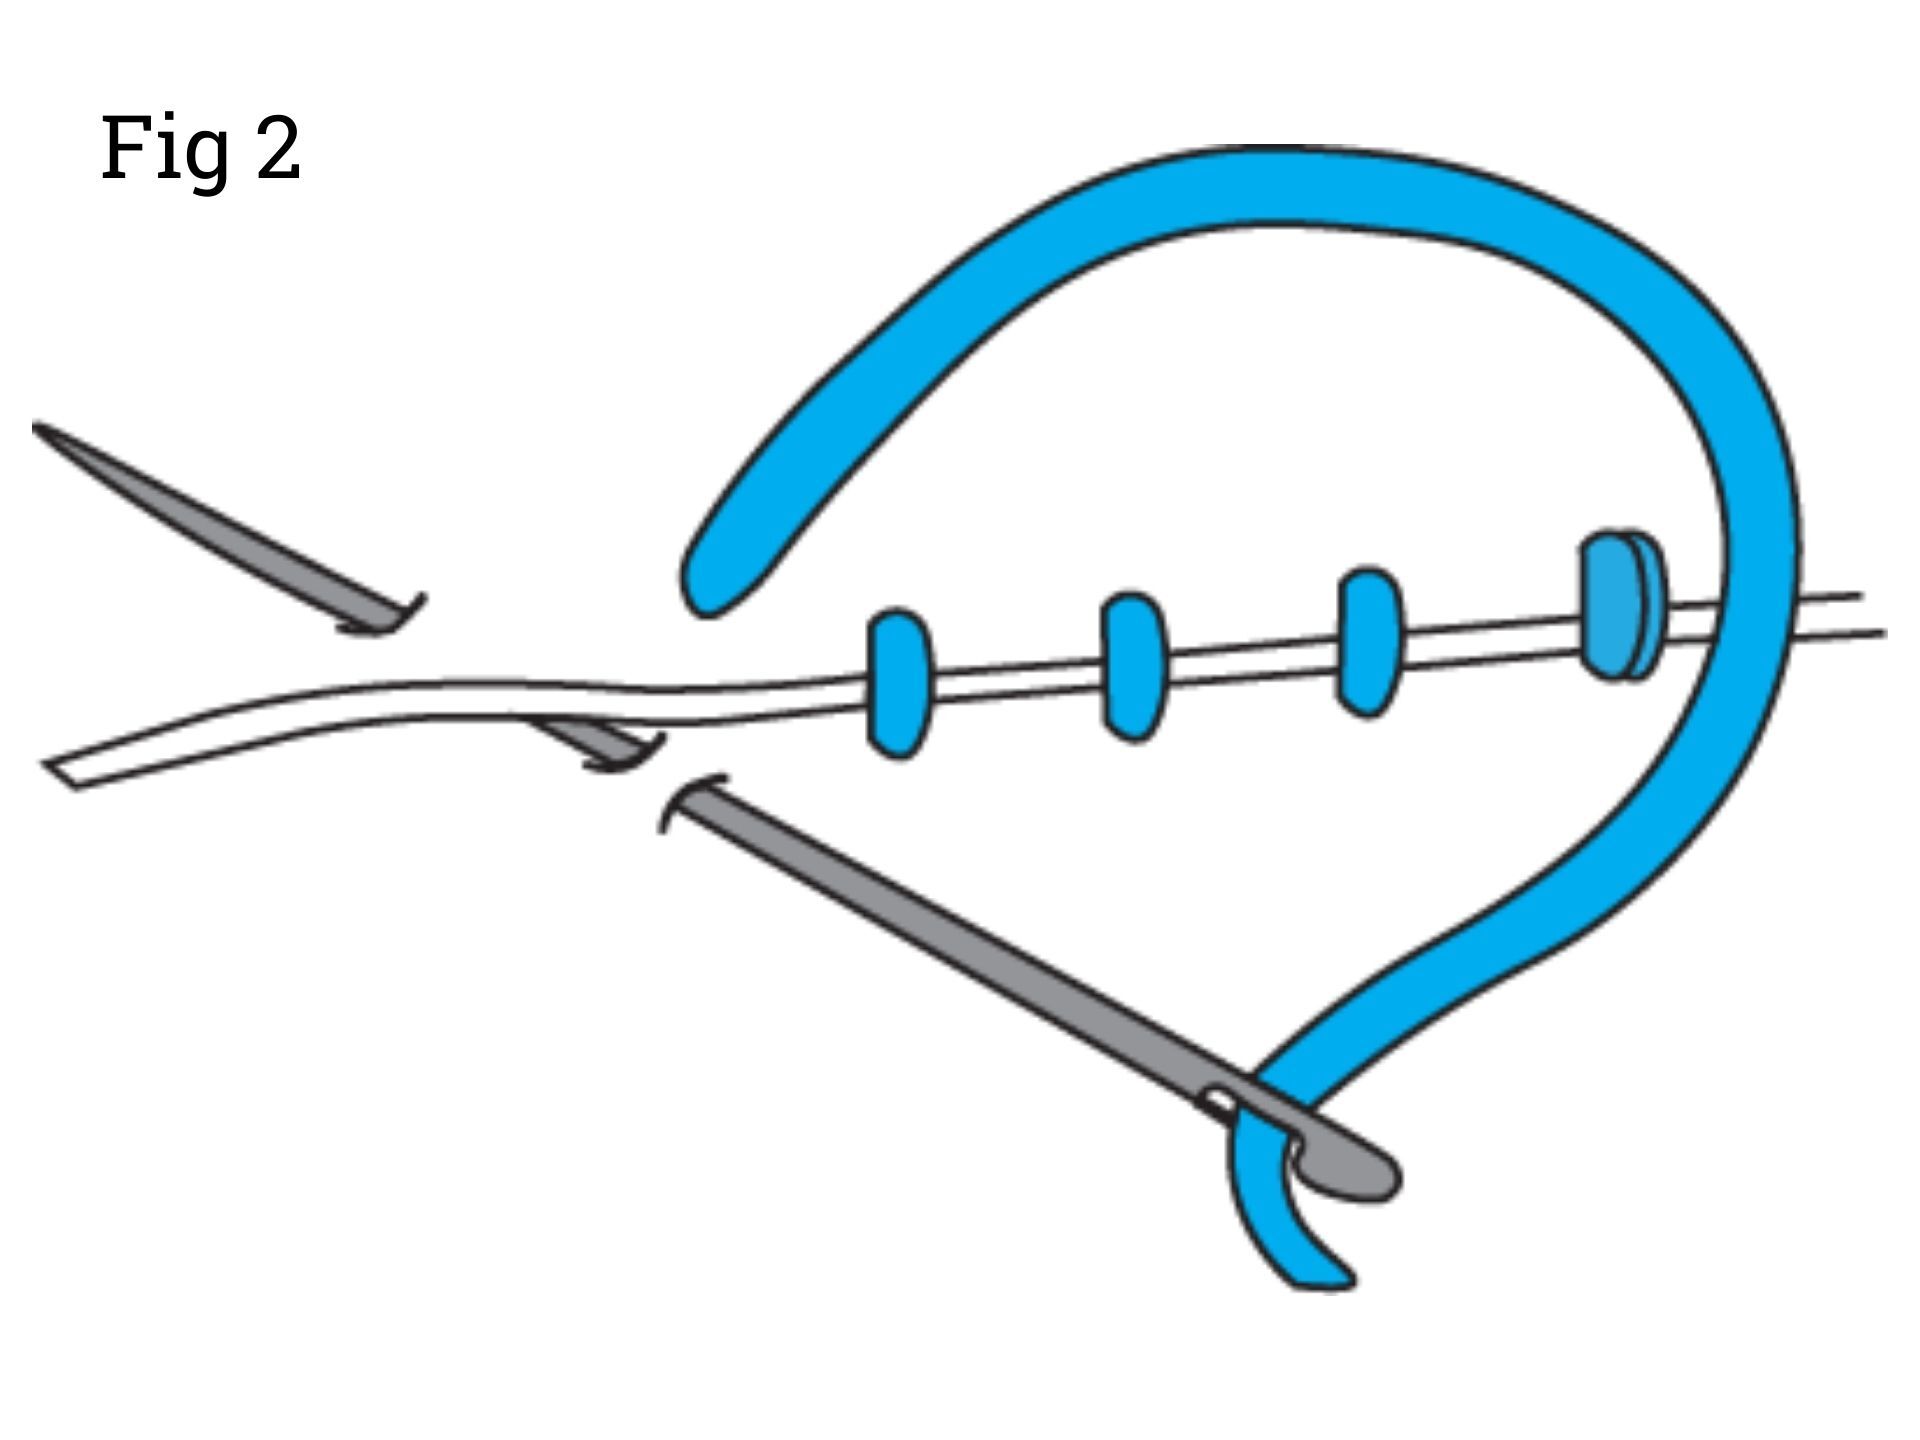
How to whip stitch
1. Whip stitch is used to sew 2 pieces of felt together at the edges.
Use a matching colour sewing thread. Hold the felt pieces together with your fingers. It should not need pins but you can use them if you prefer to keep things in place, particularly if the project is larger.
Sew over the first stitch a couple of times to make it secure. Bring the needle round to the front piece of felt and push the needle through the felt approx 3mm away from the edge (Fig 2). Make sure that the needle goes straight through both pieces of felt and does not go through at an angle.
2. The next stitch Complete the same process, bringing the needle to the front of the felt and pushing it through to the back, making the stitch approx 3mm away from the previous one. Try and make sure that all of the stitches are evenly spaced. Use your fingers or needle to help place the thread where you want it to sit.
3. The last stitch When you have come to the end of your stitching, sew over the last stitch 2 times to secure it. Then thread the needle back inside the 2 layers and bring it back out about 3cm away. Pull the thread tight and cut it off so that it will shrink back inside the 2 felt layers and will not be seen.
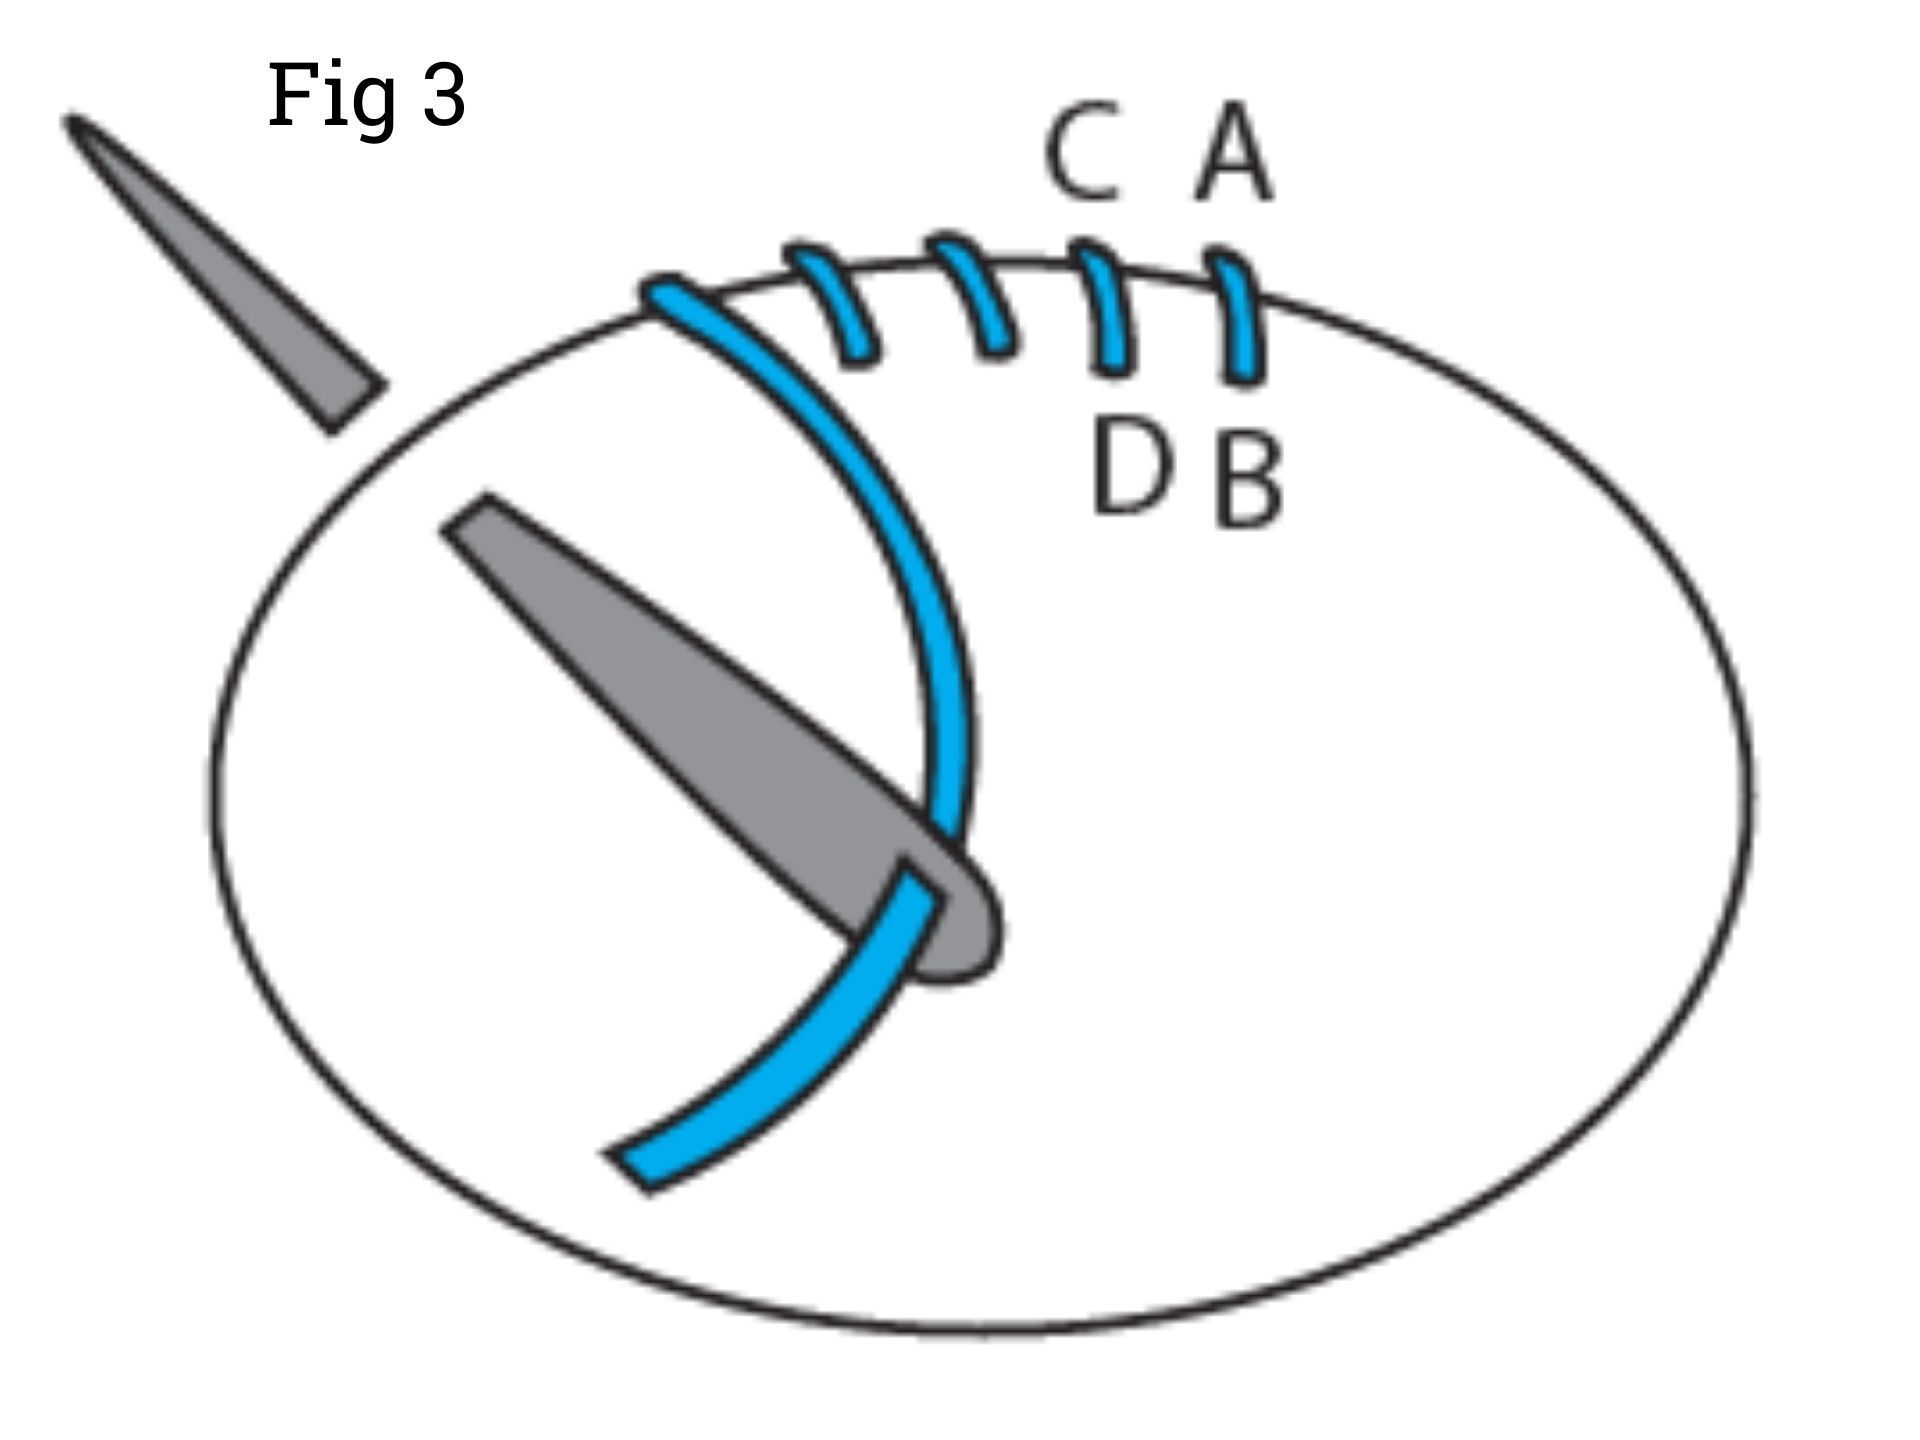
How to applique using whip stitch
1. This technique attaches one piece of felt on top of another piece of felt. Lay the smaller piece of felt on top of the larger piece. Use pins if it is a very large piece but otherwise, use your fingers to keep it in place. Use all-purpose sewing thread. At the back of the larger piece of felt, in a place that will be covered by the smaller piece of felt, sew over a single stitch several times to secure it. Bring the needle through from the back of the larger piece of felt through to the front, not going through the smaller piece of felt, at A. The thread should be positioned just on the outside of the smaller piece’s edge (Fig 3).
2. The first stitch
Make the first stitch by threading the needle into both pieces of felt approx 2-3mm away from the edge of the smaller piece of felt at B. Come back up at C. Go back into both pieces of felt at D. Continue .
3. The last stitch
When you have come to the end of the sewing, make sure that the needle comes through to the back of the larger piece of felt. Sew over a stitch several times to secure it, where it will not be seen, then cut the thread off approx 1cm away.
How to ladder stitch
Use this stitch when 2 pieces of felt are butted up next to each other and there is no overlap (Fig 4). The stitches should look like a ladder.
If using embroidery thread, tie a knot in the end of the embroidery thread. If using sewing thread, sew over the first stitch twice (A-B).
Pull the needle out through the felt at A, approx 3 mm from the edge, and put it into B. Bring the needle across the back of the felt and come out at C.
Go straight across to D. Keep repeating. Do not pull the stitches too tight. Allow both pieces of felt to sit flat, butting up next to each other so that there are no gaps between them.
For the last stitch, tie a knot at the back of the felt if using embroidery thread. If using sewing thread, sew over the last stitch several times to make it secure.

How to embroider a French knot
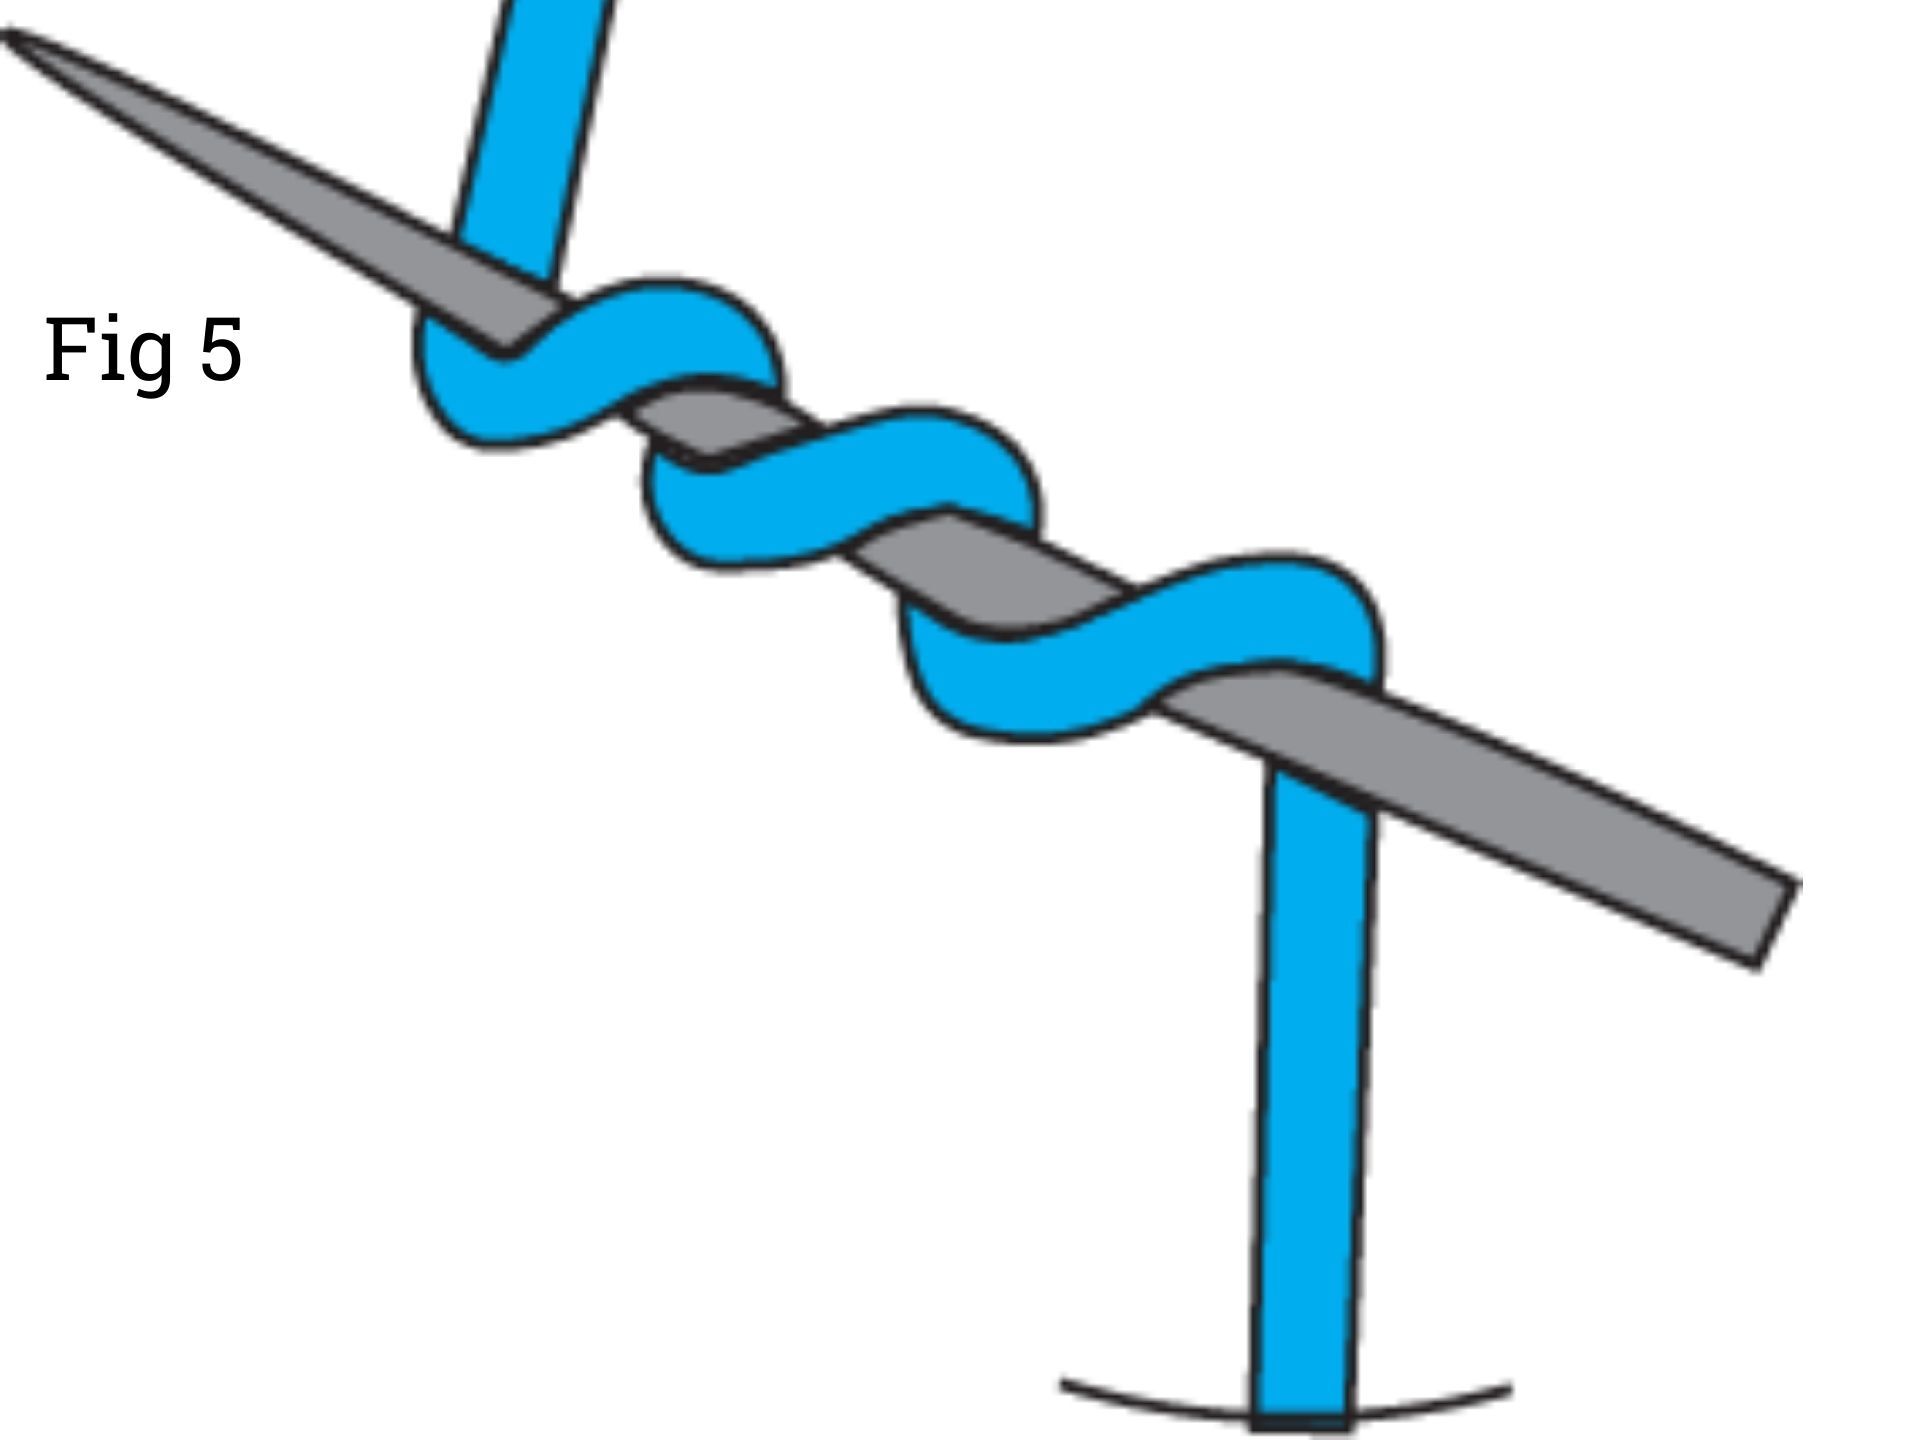
1. Tie a double knot at the end of the embroidery thread & push the needle through the felt, until it is secured in place by the knot. Hold the needle about 4 cm away from the entry point and point the needle away from the fabric.
Don’t point the needle towards the fabric as this will not work as well. Hold the thread with your fingers and wrap it around the end of the needle 3 times (Fig 5).
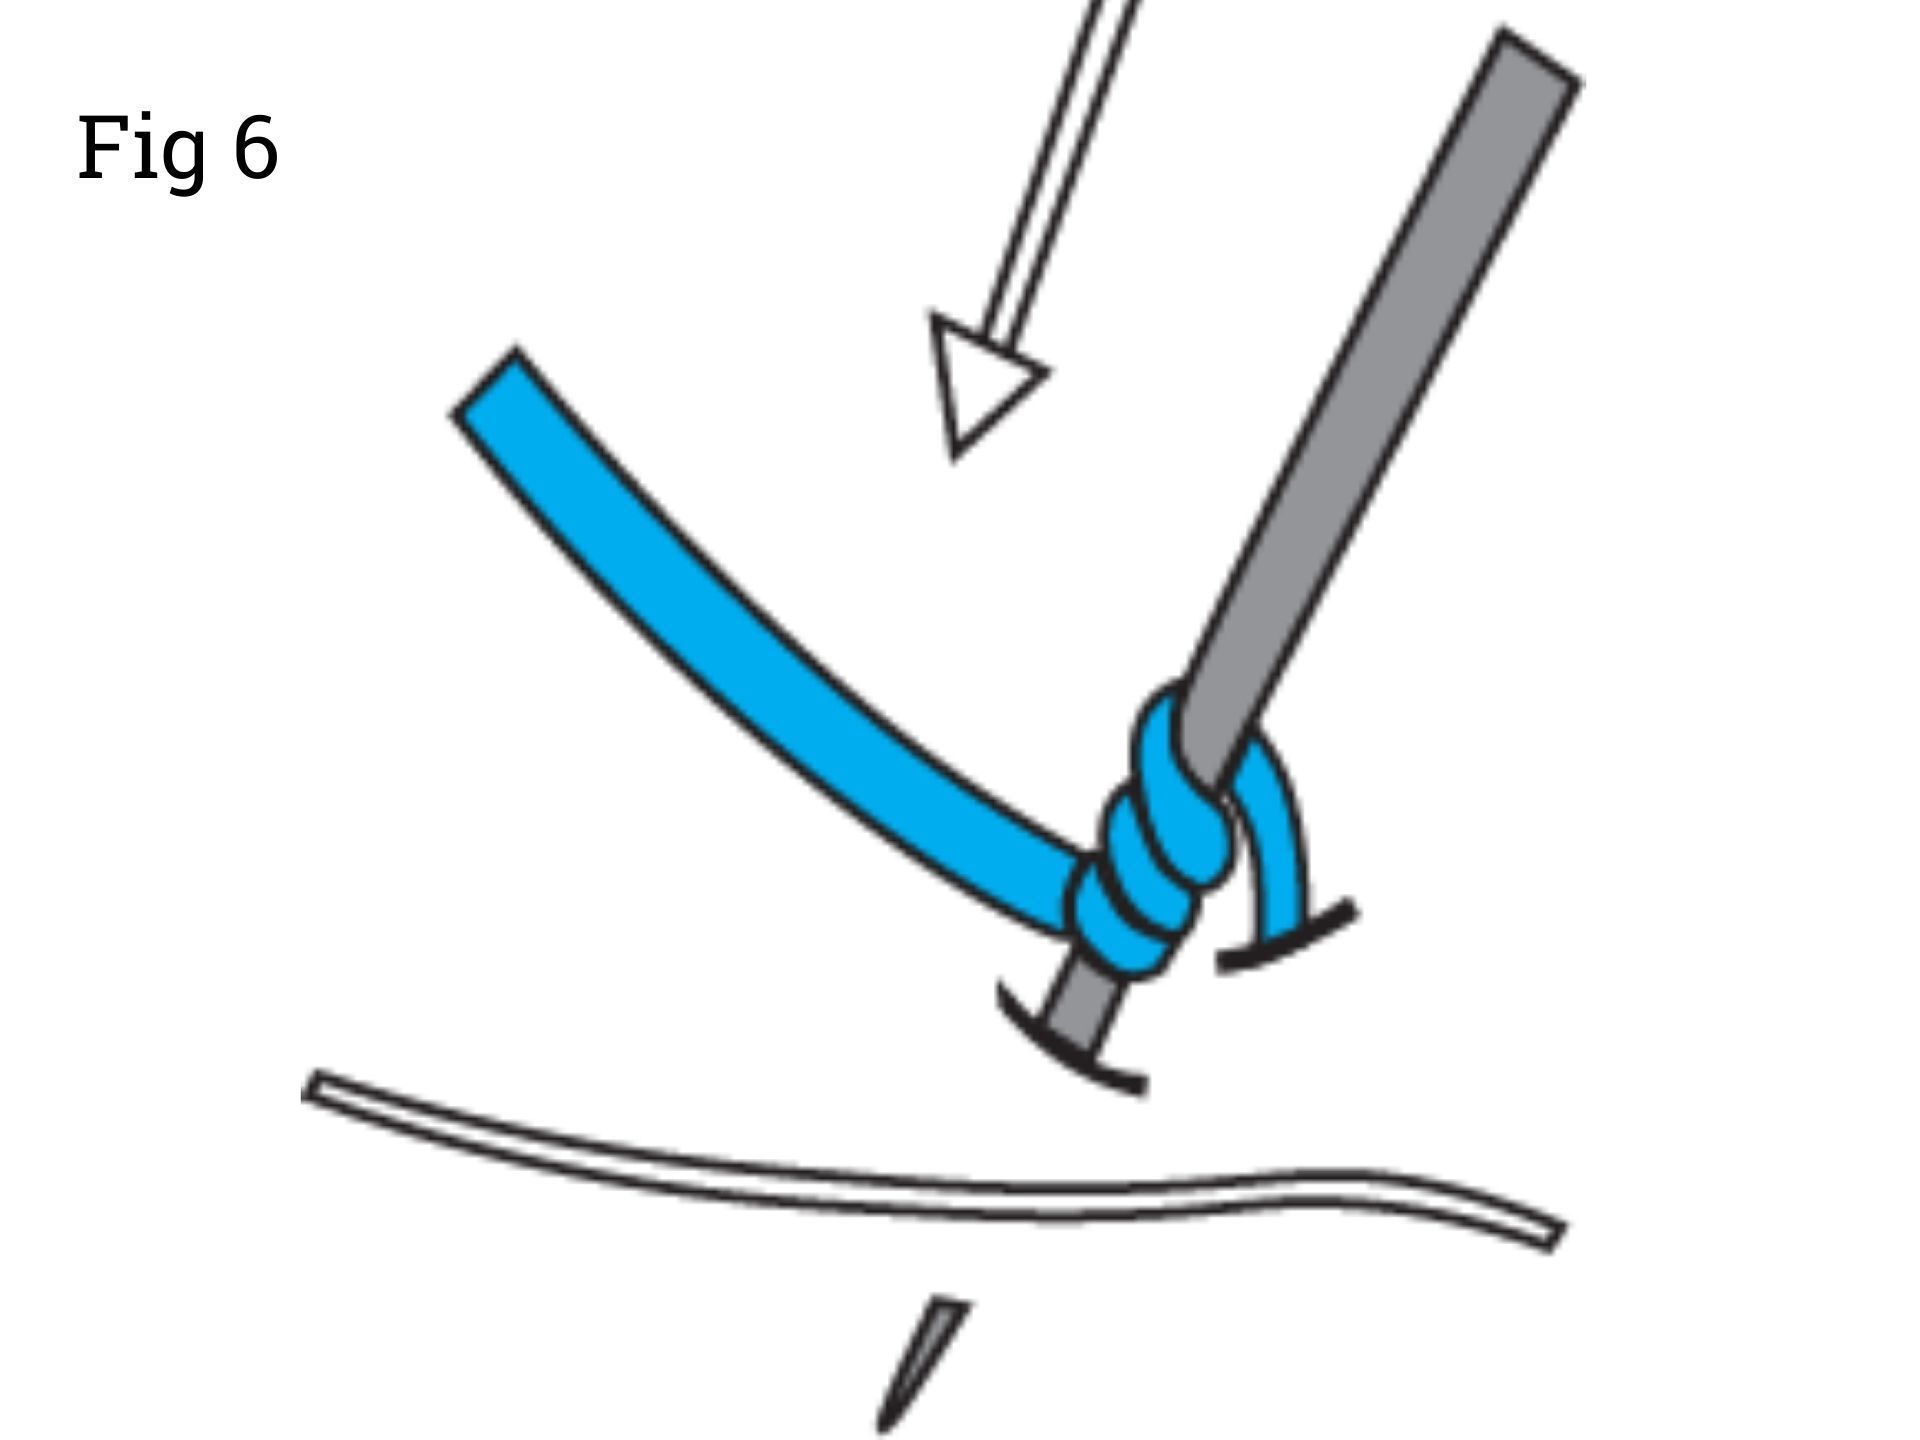
2. Now turn the needle round, point it towards the fabric and push it half way into the fabric. Enter the fabric 2 mm away from where the thread originally came out.
Do not put it through the same hole or the knot will collapse.
Pull on the thread which is wrapped around the needle so that it slides down the needle and is sat right at the point where the needle meets the fabric (Fig 6).
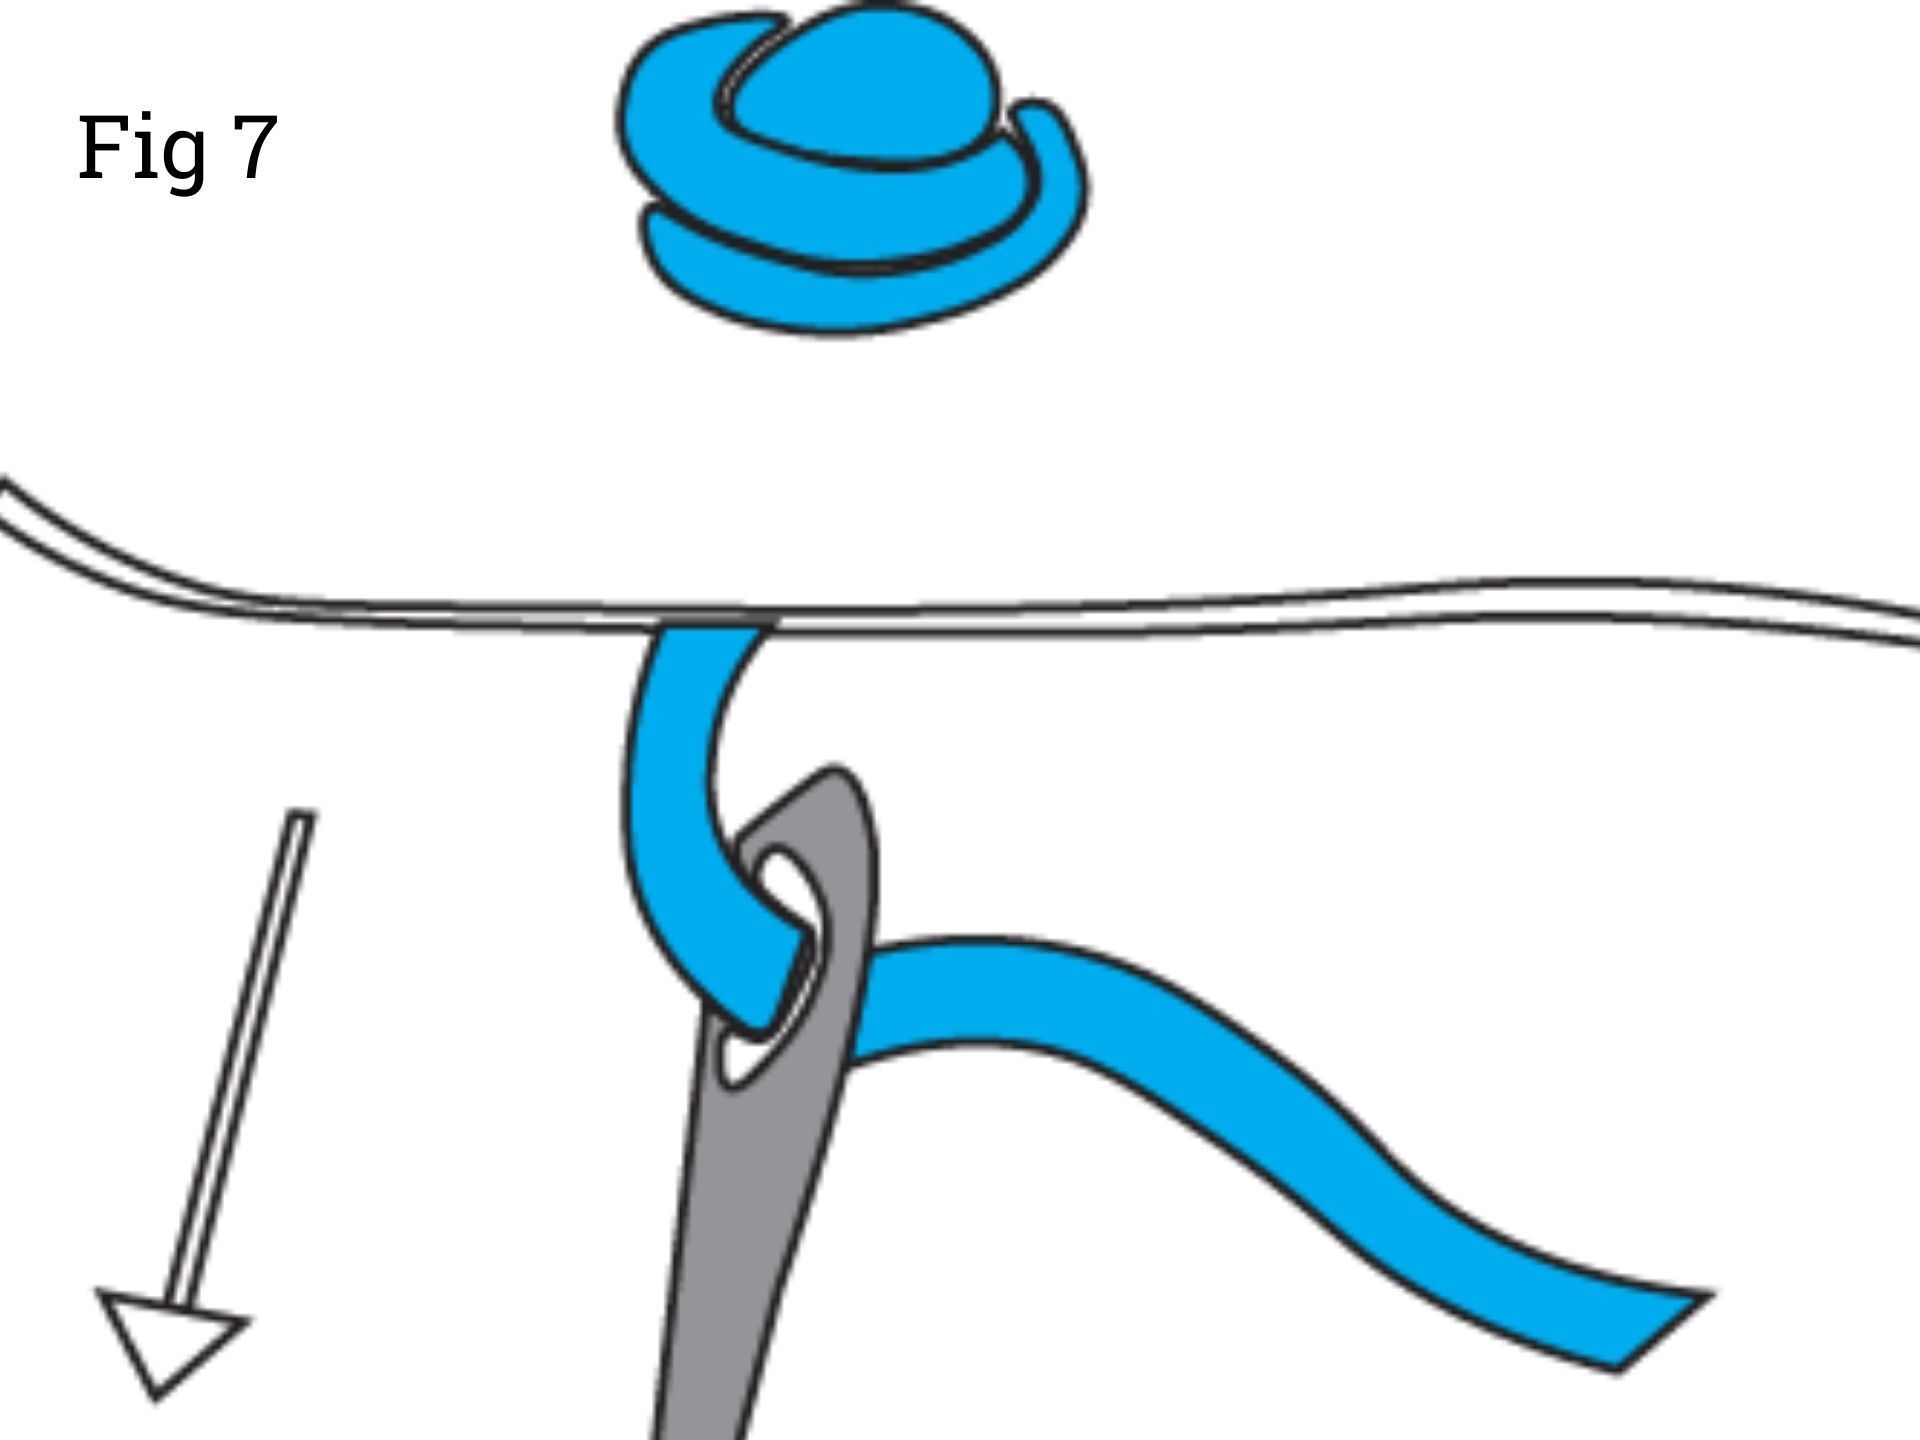
3. Keep hold of this thread and push the needle through the felt to make the perfect French knot. (Fig 7).
Tie a knot in the embroidery thread and cut it off 1cm away from the knot.
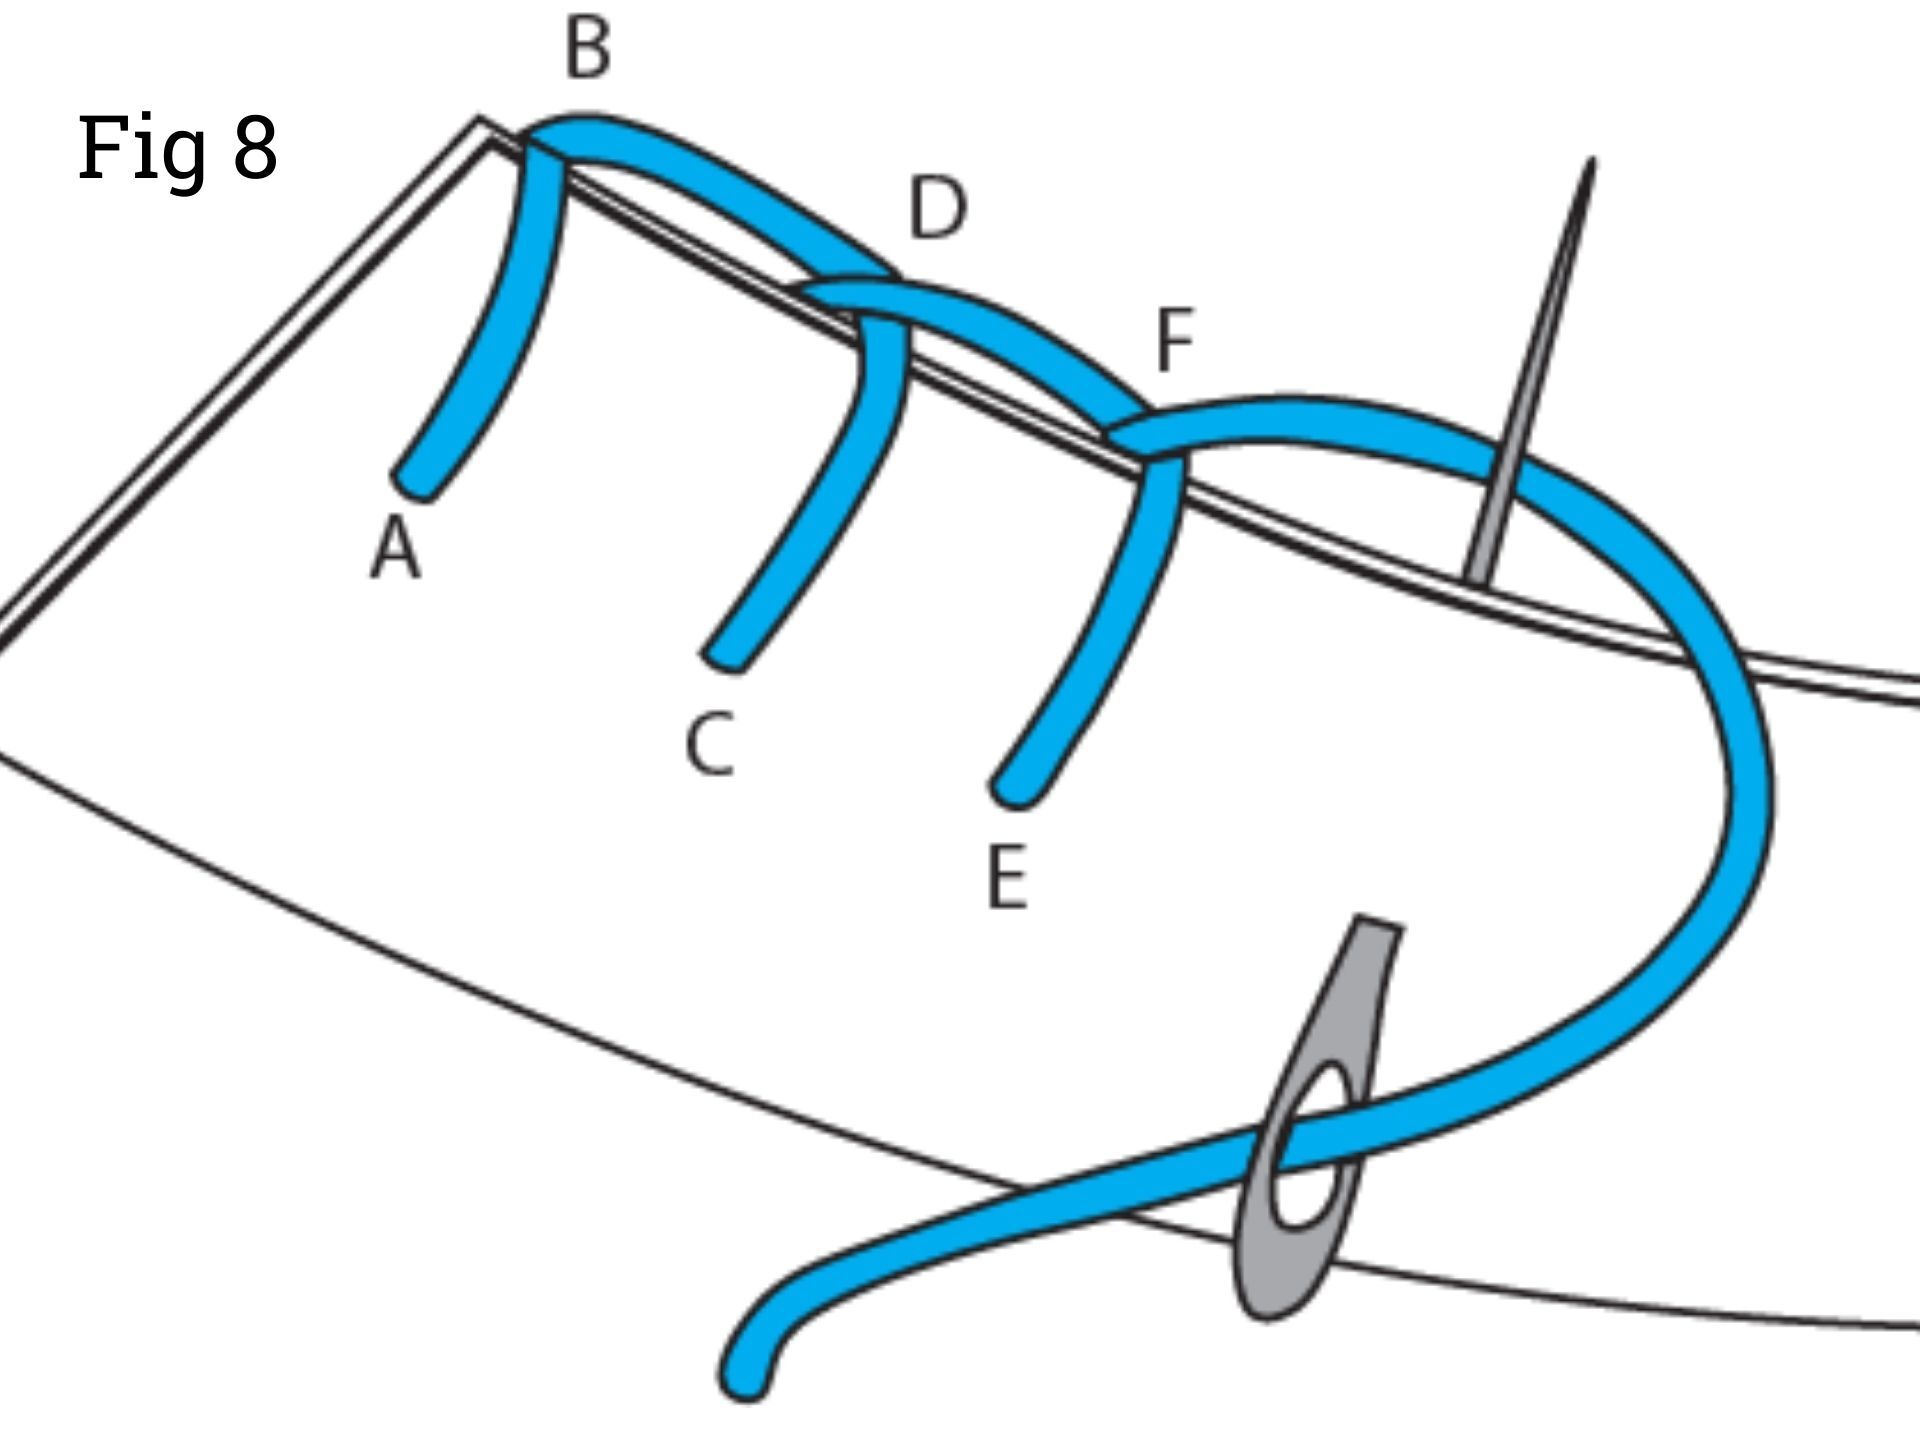
How to blanket stitch
Blanket stitch is used to sew 2 pieces of fabric together.
Use embroidery thread for blanket stitch which will show the stitches off (Fig 8).
Tie a knot at the end of the thread and sew through the front single piece of felt at A, approx 3 mm away from the edge. Don’t sew through both pieces of felt, just the front one.
The knot will be trapped inside the 2 pieces of felt and won’t be seen.
Sew a stitch that goes over the top of both pieces of felt and comes back through both pieces, out at point A again.
When pulling the thread, leave a loop at the top B, and thread the needle through the loop. Then pull the thread so that the loop is closed and the thread is now at point B.
Sew the thread into C, leaving a loop of thread at the top.
Thread the needle through the loop D, and then pull the loop closed.
Continue this cycle.
For the last stitch, sew the needle inside the 2 pieces of fabric and tie it off with a knot.